How to properly repair a wall heater
- Marco Thomas

- Apr 19, 2022
- 5 min read
If you're like most people, your home is your biggest investment. And just like any other big investment, you want to make sure it's taken care of properly. One of the most important things to keep in mind when caring for your home is the prevention of small problems from turning into big ones. That's why it's important to know how to properly repair a wall heater. By taking care of this one small item, you can help ensure that your home stays warm and comfortable all winter long.
Wall heaters are a common type of heating system in homes and apartments. While they are typically very reliable, over time they can develop issues that require repair. If you have a wall heater that is not working properly, it is important to call a professional heating repair company to have it repaired as soon as possible.
There are a few things that you can do to troubleshoot your wall heater before you call a professional. First, check to make sure that the power is turned on. Next, check the thermostat to see if it is set properly. Finally, inspect the unit for any visible damage or debris that may be blocking the air flow.
If your wall heater is still not working after troubleshooting, it is time to call a professional. A heating repair company will be able to diagnose the problem and make the necessary repairs. They may also recommend replacing the unit if it is old or damaged beyond repair. Wall heaters are a vital part of many homes and apartments, so it is important to make sure that they are working properly at all times.

1. Shut off the power to the wall heater
If you're having problems with your wall heater, one of the first things you should do is shut off the power to it. This will prevent any further damage from occurring and will make it easier for you to repair the heater.
To shut off the power to your wall heater, locate the circuit breaker box and find the breaker that controls the power to the heater. Once you've found the right breaker, flip it to the "off" position.
If you're not sure which breaker controls the power to the heater, you can also shut off the power to the entire house by flipping the main breaker to the "off" position. However, this should only be done as a last resort, as it will shut off power to all of the appliances in your home.
2. Remove the front cover of the heater
If your wall heater is not working properly, you may need to remove the front cover in order to access the interior components. This can be a tricky process, so it's important to follow these steps carefully.
First, turn off the power to your heater at the breaker box. Next, remove the screws that hold the front cover in place. Be careful not to lose these screws, as they can be difficult to find replacements for.
Once the screws are removed, the front cover should come off easily. If it is stuck, you may need to use a putty knife or other flat tool to gently pry it loose. Be careful not to damage the cover or the underlying components.
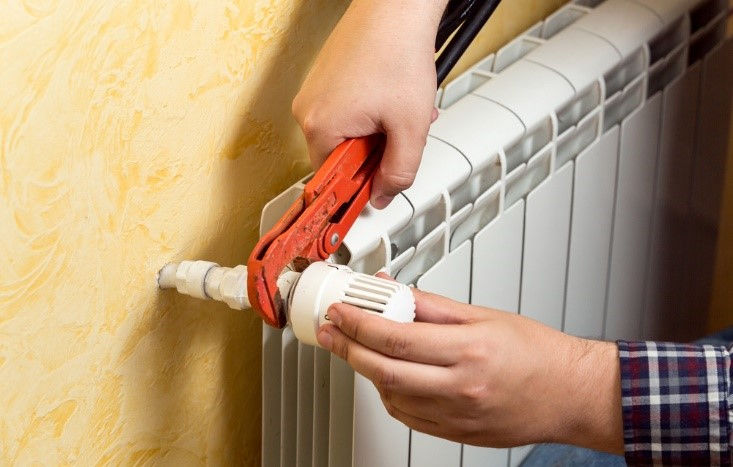
3. Check for any loose wires or connections and fix them if necessary
If your wall heater is not working properly, the first thing you should do is check for any loose wires or connections. Loose wires can cause the heater to overheat and potentially start a fire. Therefore, it is important to make sure all wires are secure and connected properly.
If you find any loose wires, simply tighten them with a screwdriver. You may also need to replace any damaged wires. Once you have checked and repaired any loose wires, you should then test the heater to see if it is working properly.
If your wall heater is still not working after checking for loose wires, you may need to contact a professional wall heater repair service. Wall heater repair can be tricky, so it is best to leave it to the experts.

4. Clean out any dust or dirt from inside the heater
Wall heaters are great for providing extra warmth in a room, but they can also become dusty and dirty over time. If your wall heater is not working as well as it used to, it might be time to clean it out.
First, unplug the heater from the wall outlet. Then, using a vacuum with a soft brush attachment, carefully vacuum the exterior of the heater. Next, use a damp cloth to wipe down the inside of the heater, being careful not to get any water on the electrical components. Once you've cleaned out the dust and dirt, plug the heater back in and turn it on. You should notice an improvement in performance.
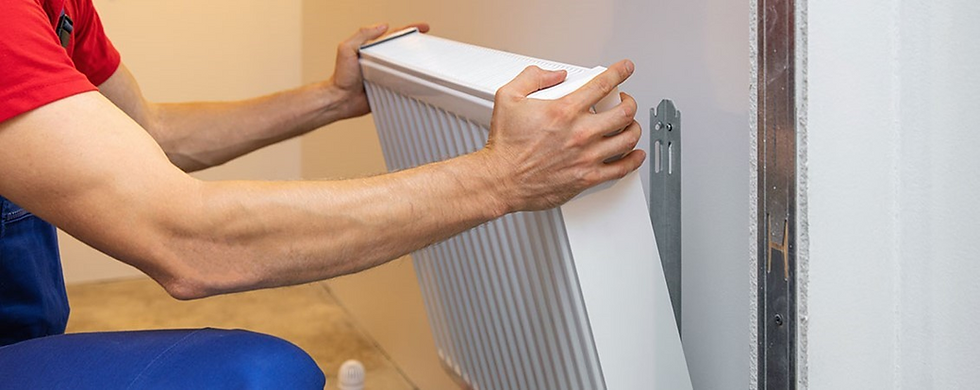
5. Replace the front cover and turn on the power
If your wall heater isn't working properly, it may be time to replace a wall heater. This is a relatively easy repair that you can do yourself.
To replace the front cover, first turn off the power to the heater at the circuit breaker. Then remove the old cover by unscrewing the screws or bolts that hold it in place. Be careful not to lose any small parts.
Next, attach the new cover using the screws or bolts that come with it. Make sure the cover is securely in place. Finally, turn the power back on at the circuit breaker and test the heater to make sure it's working properly.
6. Test the heater to make sure it's working properly
Wall heaters are a common type of home heating system. While they are generally reliable, they can sometimes stop working properly. If your wall heater is not working, there are a few things you can do to test it and make sure it is functioning properly.
First, make sure that the power is turned on. Wall heaters typically have a switch on the wall near the unit that must be turned on in order to function. If this switch is not turned on,
First, check the thermostat to make sure it is set correctly. If the thermostat is set too low, the heater will not come on. Also, make sure that the power switch is turned on. If the switch is turned off, the heater will not work.
Next, check the pilot light. If the pilot light is out, the heater will not work. To relight the pilot light, follow the instructions in your owner's manual.
If the pilot light is lit but the heater still does not seem to be working, check the air intake and exhaust vents. Make sure that they are clear of debris and that there is nothing blocking them.
Conclusion: If you are in need of wall heater repair, be sure to contact a professional. Trying to fix it yourself could result in further damage and cost more money in the long run. Our team at EZ Heat And Air is here to help with all your heating needs. Give us a call today!
Author Bio:- Michael Cabral
Michael is a marketing manager at EZ Heat and Air. He loves writing about innovative and hybrid HVAC installation tips. His articles help readers to have valuable insights into the importance of duct cleaning, water heater maintenance, and repair, optimum working of the thermostat, Mini-split and heat pump installation in Orange County. Read articles for more information on keeping your HVAC system in tip-top condition and leading a hassle-free life.

Comments